The crew cut is a timeless, low-maintenance hairstyle that never goes out of fashion. It is clean, practical, and suits almost every face shape. Achieving a flawless look requires the right technique. This guide provides ten simple steps to get the perfect crew cut.
Step 1: Start with Clean, Dry Hair
The foundation of any great haircut lies in proper preparation, and a crew cut is no exception. Begin by ensuring your hair is freshly washed and thoroughly dried. Clean hair is free of oils, dirt, and product buildup, which can impede the clippers’ ability to glide smoothly and evenly through the hair. Using a mild shampoo, cleanse your hair thoroughly and rinse well to remove any residue. Gently towel dry your hair, but avoid using excessive heat or leaving it damp. Hair that is completely dry allows you to evaluate the true length and texture. Wet hair can appear longer than it actually is, often leading to accidental overcuts or uneven sections. Dry hair also provides a natural lay, making it easier to identify growth patterns and trim accordingly to achieve a polished finish.
For those handling their own haircut, ensure you use a mirror, preferably with a three-way setup, that reflects all angles. You’ll want to see both the front and the back of your head clearly to avoid mistakes. A proper towel or cape draped around your shoulders can help keep your neck clean and free of loose hair clippings. Investing time in this preparation step ensures a smoother, more even cut and minimizes the likelihood of needing corrections later on.
Step 2: Choosing the Right Guard Size
The next major step in achieving the ideal crew cut is selecting the appropriate clipper guard size for your desired length. This decision sets the tone for the overall style, as the guard determines how much length will remain on your hair. For a traditional crew cut, a #3 or #4 guard is often used for the hair on top. These settings leave enough length for a clean, classic look while keeping the style low-maintenance. Using a higher guard, such as #4, will result in slightly longer hair, which can provide a softer appearance. For a sharper, more defined finish, go with a #3 guard or lower.
For the sides, it’s common practice to go significantly shorter to create contrast between the top and the sides. Typically, a #1 or #2 guard is used to achieve a tight, tapered look. Begin on one side of the head, starting from the bottom hairline and gradually working your way upward. Use steady, consistent strokes with the clippers, and make sure to blend seamlessly into the longer hair on top as you move upward. This blending is crucial for avoiding harsh lines and achieving that flawless transition typical of a well-executed crew cut.
If you’re uncertain which guard size to start with, consider consulting a style chart. Many barbers and stylists offer these charts as a visual guide to different hair lengths and crew cut variations. They can provide you with a clear idea of how each length will look before you make your choice. For professional results, especially if you’re in a bustling style hub like New York, visiting an established barber known for expert crew cuts can be incredibly valuable. Stylists trained in Crew Cut Haircuts in New York are adept at tailoring the cut to complement face shapes, hair textures, and personal preferences. Always remember, the key to a flawless crew cut lies as much in the technique as in the tools and preparation.
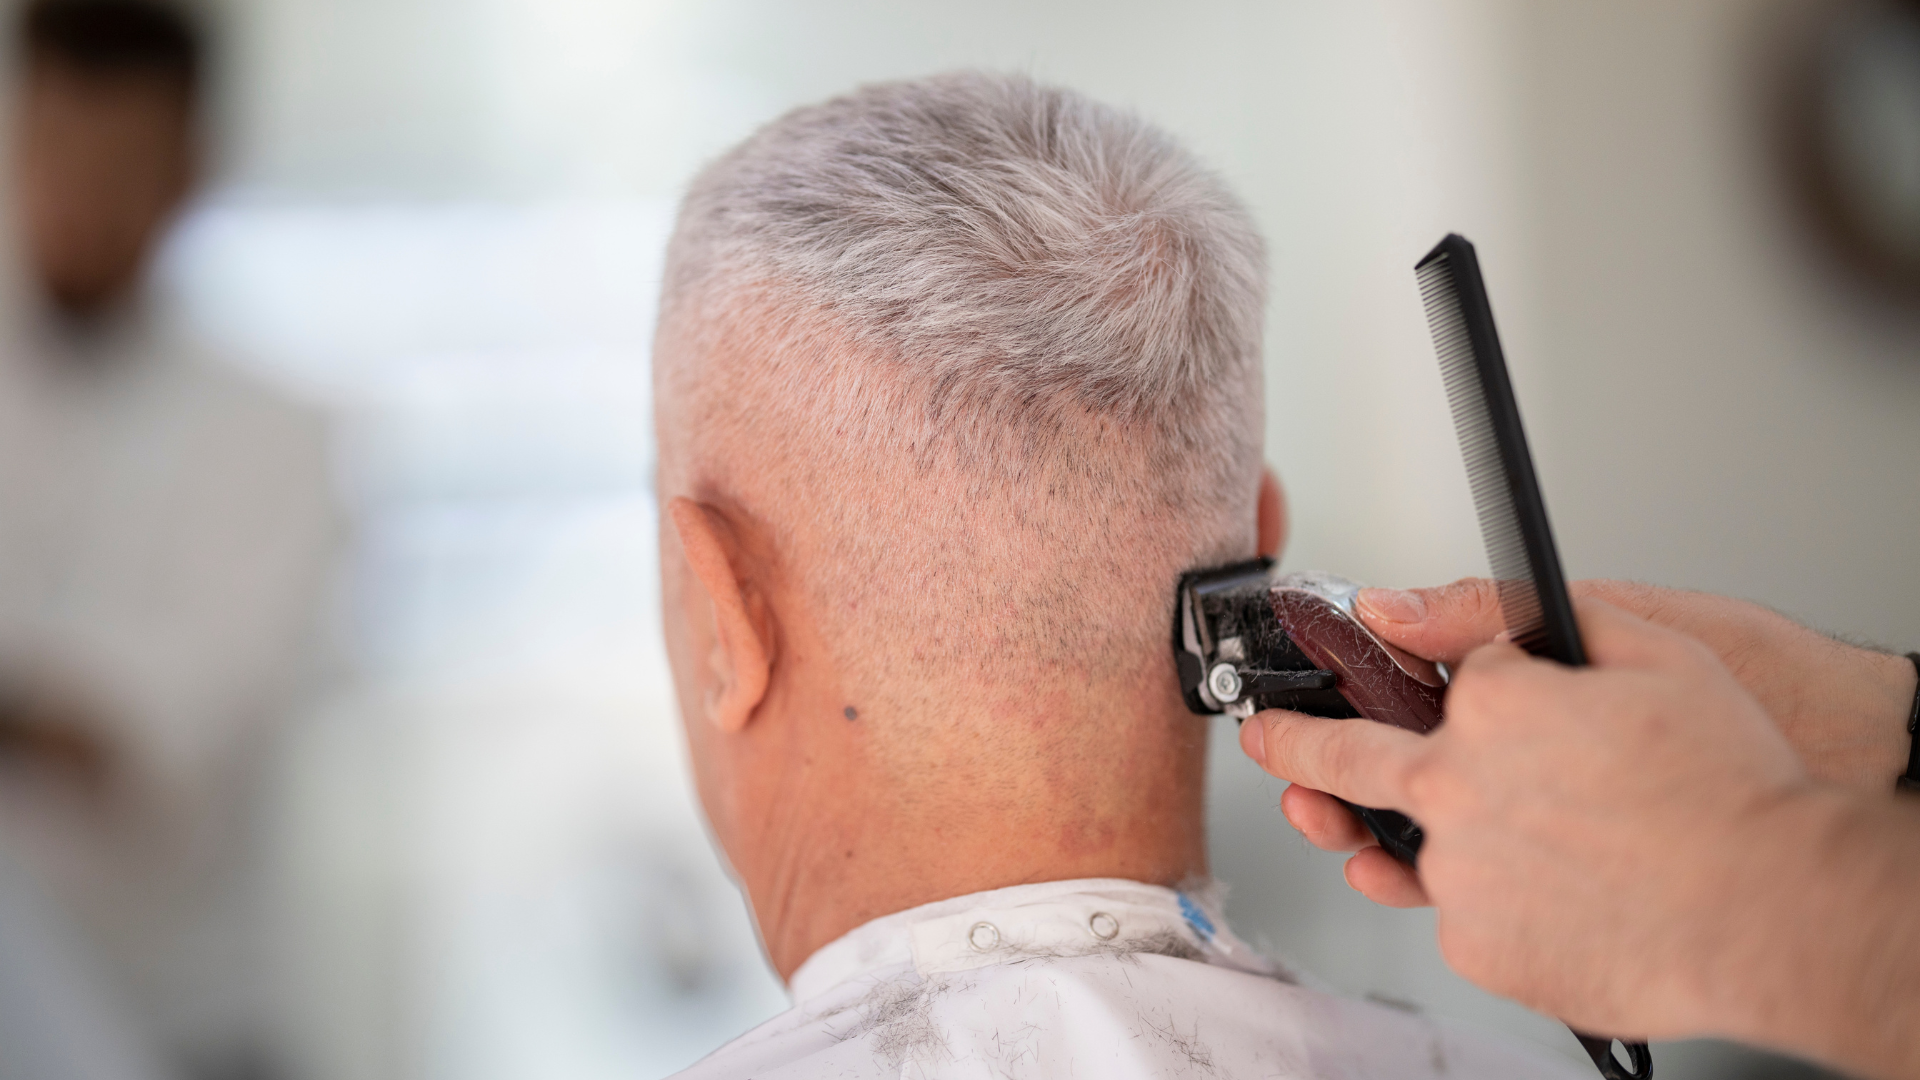
Step 3: Trim the Sides and Back
Begin by attaching the guard of your choice for trimming the sides and back. The guard size is typically #1 or #2, as these are common lengths for achieving a clean, tapered appearance. Starting at the hairline at the nape of the neck, position the clippers so they are angled against the natural direction of hair growth. This ensures that the clippers lift and cut the hair evenly with every pass.
Using smooth and steady strokes, glide the clippers upward towards the crown of the head. Be sure to overlap each stroke slightly to avoid missing areas and to maintain a consistent look. The movement should be deliberate and controlled, with special attention given to avoiding uneven spots or harsh edges. Work slowly around the head in a systematic manner, starting from the back of the head and gradually transitioning to the sides. To ensure symmetry, alternate between the left and right sides, regularly stepping back to assess overall balance. A hand mirror can be a helpful tool for checking difficult-to-see sections like the back of the head. Consistency and patience are key in this step for achieving a polished outcome.
Step 4: Blend the Top with the Sides
Blending the top with the sides is a crucial step to create a smooth, seamless transition between different hair lengths and avoid a disconnected or harsh appearance. Begin by selecting a shorter guard size between the top and side lengths, or employ the clipper-over-comb technique for precision. If using a comb, hold it at an angle where the top and side sections meet, allowing the clippers to carefully trim along this intersection. This method provides control over how much hair is cut and aids in gradually tapering the lengths.
Move the clippers or comb around the head, blending the sides into the top section uniformly. Aim for soft, natural gradients rather than sharp lines or abrupt differences in length. Constantly adjust the angle and position of the comb or clippers based on the curvature of the head to maintain even cutting. Frequently step back to review your progress, running your hand over the blended area to ensure smoothness and alignment. This step is particularly essential in achieving a clean, professional finish that aligns with modern hair trends. Mastering this blending technique separates an amateur cut from a barber-quality result.
Step 5: Cut the Top of the Hair
Now it’s time to focus on shaping the top of the hair. Switch to the longer guard selected for this section. Typically, on crew cuts, the top is kept slightly longer than the sides to provide structure and balance. Begin at the front hairline and slowly move the clippers back towards the crown, maintaining steady pressure and an even pace for a uniform trim. Hold the clippers at a slight angle if necessary to account for the head’s natural contour.
After the initial pass, run the clippers over the top several times in different directions. Hair tends to grow and settle in varied patterns, so cross-cutting ensures all strands are trimmed to the same length. Check your work frequently by running your hand or a wide-tooth comb through the top section to identify any uneven areas or stray hairs. If needed, fine-tune the cut by revisiting specific spots and making minor adjustments.
To add a personal touch, consider creating a subtle taper or texture at the crown or front hairline, depending on the individual’s style preference. Using scissors for a final detailing pass can help achieve this, allowing for additional control and finesse. A well-executed top cut ties the entire haircut together and enhances the aesthetic appeal of the crew cut, resulting in a sharp yet versatile look that’s perfect for daily wear or professional settings.
Step 6: Define the Hairline
Defining the hairline is a crucial step that can elevate the overall look of a crew cut and ensure a clean, polished finish. Begin by using trimmers without a guard to sharply define the edges around the ears and the nape of the neck. Move carefully, keeping the lines symmetrical and well-balanced. When working around the ears, gently pull back the ear to expose the area fully, allowing for a precise cut that follows the natural curves. Position the trimmers at the desired angle, ensuring that no unwanted hair extends beyond the line you’re shaping.
Next, focus on tapering the sideburns to blend seamlessly into the rest of the haircut. Depending on the individual’s style preference, you can choose to create a subtle fade or maintain a clean, blunt edge. Use a comb or a small brush to remove any loose hair clippings so you can clearly see the shape emerging. A crisp hairline not only frames the face but also highlights the symmetry and effort put into the haircut, making it stand out as a hallmark of modern, intentional styling.
Step 7: Check for Missed Spots
With the main aspects of the haircut complete, take the time to meticulously inspect the head from every angle. This involves careful observation for missed spots or uneven areas, as these imperfections can disrupt the polished appearance of the crew cut. Begin by examining around the crown and behind the ears, as these are common areas where stray hairs or minor inconsistencies can go unnoticed. Use a handheld mirror to check the back and sides from different perspectives, or ask the client to slightly tilt their head for a clearer view.
Once any missed spots are identified, use the appropriate tool to address them. Clippers can be used for areas requiring a consistent length, while scissors are better suited for isolated strands that may have been overlooked. Pay close attention to the transitions between different lengths, ensuring the blend remains smooth and natural. This step is essential in achieving a perfectly even cut that feels professional and refined. By taking the time to fine-tune these details, you can guarantee the haircut will hold up to close scrutiny.
Step 8: The Finishing Touches with Scissors
The finishing touches are where a good haircut transforms into a truly exceptional one, and utilizing barbering scissors for this step allows for ultimate precision and finesse. Start by lightly texturizing the top section of the hair. This can be achieved by carefully lifting small sections with a comb and using the scissors to make subtle snips at an angle. This technique adds movement and character to the hairstyle while preventing it from looking too rigid or flat. Consider the client’s hair type and personal style when determining how much texture to introduce.
With the top styled, move on to softening the front hairline. Using scissors to lightly refine the edges can add a natural finish that complements the sharp lines created earlier with the trimmers. This process involves snipping sparingly to ensure the front blends harmoniously with the rest of the haircut. To avoid overcutting, take your time to assess the visual balance after each adjustment.
The final touch is to comb through the entire haircut, removing any remaining trimmed hairs and giving one last look to ensure symmetry and consistency. Small details, such as marginally rounding sharp angles or blending any harsh lines, can make a world of difference. The effort to provide this level of precision and care is what separates a standard haircut from one crafted by a top-tier barbershop in New York. These finishing touches are instrumental in delivering a modern crew cut that is sharp, stylish, and tailored to perfection.
Step 9: Clean Up and Moisturize
The finishing touches are just as important as the cut itself. Begin by using a small, soft brush or a handheld neck duster to gently remove any loose hair clippings from the neck, face, and shoulders. Pay close attention to areas like around the ears, the nape, and the neckline where hair clippings tend to accumulate. This step ensures the client feels fresh and clean while also showcasing the crisp outline of the cut. Afterward, apply a light moisturizer or an aftershave balm specifically designed for sensitive skin to the freshly shaved areas, such as the neckline. This step not only soothes the skin but also helps prevent post-shave irritation and redness. Look for products infused with aloe vera or chamomile for added comfort and hydration. Taking this extra precaution ensures skin health and provides an overall polished finish to the haircut.
Step 10: Maintain the Style
While a crew cut is famed for its effortless appeal and low maintenance, regular upkeep is key to keeping it looking sharp. The cut has a clean and structured appearance when freshly trimmed, but it is important to plan for touch-ups every 3-4 weeks. This frequency helps maintain the defined shape, particularly along the neckline and sides where growth becomes most noticeable.
Between trims, styling products like pomade or wax can be a game-changer for adding texture or definition to the top of the hair. Using a small amount of product, work it through the hair with your fingers for a messy yet deliberate look, or use a comb for a sleeker finish. Select a product with medium hold and a matte finish for a naturally styled appearance that complements the cut’s simplicity. For added control, lightweight grooming creams or sprays can also help tame any flyaways, keeping the style polished throughout the day.
Conclusion
By following these ten steps, anyone can master the process of achieving a clean and classic crew cut. Its timeless look, combined with its practicality, ensures it remains a favorite among individuals of all lifestyles. The crew cut’s hallmark is its versatility—it suits nearly all face shapes and occasions, from professional settings to casual weekends. With proper technique during the haircut and consistent maintenance afterward, the crew cut offers a look that is effortlessly stylish and universally appealing. Whether you’re a professional barber or handling your own grooming, meticulous attention to detail ensures that every crew cut is sharp, symmetrical, and tailored to perfection.